NCLA's Beverly Hills Bunny

NCLA's Beverly Hills Bunny is described as a "deep perfect hot pink". It's their take on the most popular nail color in history. It's opaque in just 1 coat but I needed 2 coats to even it out. It's already shiny even without the top coat but I still applied 1 coat of Seche Vite to make the polish last. I love this color. Perfect for a night out or to add a little pizzaz to a plain outfit :)

NCLA's Beverly Hills Bunny

NCLA's Santa Monica Shore Thing and Pick Me Up At Melrose Place

Went to the beach over the weekend and I wanted to wear something bright and summery for my nails despite the gloomy weather. I chose NCLA's Santa Monica Shore Thing and Pick Me Up At Melrose Place. It turned out really nice! I especially love Santa Monica Shore Thing as it reminds me of the Tiffany Green Color. Here are the description of the shades from their website:

Santa Monica Shore Thing:
"Bright white beaches, streaks of sun-bleachedblond, brown tan bodies and a clear, cool ocean breeze. Yes please! Seriously, this light mint crème has the potential of a mild obsession in the making."

Pick Me Up At Melrose Place:
"Hip stores, high-end restaurants and hot nights. A lot is happening around Melrose. And lots more with the rich bright purple that screams just loud enough for the right kind of attention." 

Bright shades by NCLA Nail Lacquer.

a-England Guinevere

I've heard a lot of great reviews for a-England polishes and when I tried a-England Guinevere the other day, I was not disappointed at all! The consistency of the polish was just perfect, the best I've tried so far and it's so easy to apply. No streaks and it is fully opaque in just 2 coats.

a-England nail polish is available locally at Polish Please! for Php630. You might think that the price is a bit steep but I assure you it's worth it!

Note: New a-England shades, including the new collection, will be available at Polish Please! by the 2nd week of November :)

a-England Guinevere (with flash)
a-England Guinevere (with natural light)

Another shot with natural light
Bottle close-up
Up close

Zoya Avery and My First Attempt at Nail Stamping

Happy hump day everyone! :)

I was not in the mood for bright colored nails the other day so I decided on this neutral color by Zoya. I have on my nails Zoya Avery. This is a lovely color for ladies who don't want to keep on changing their manis to match their outfit because this shade would match almost anything! Formulation is great and is opaque in just 2 coats. The pictures show 2 coats of Zoya Avery and 1 coat of Seche Vite Top Coat.

Zoya Avery

Zoya Avery

Zoya Avery

Zoya Avery

Zoya Avery (with flash)

My first attempt on nail stamping was a complete disaster so I decided to read up on the topic first before trying again. The second time around was waaaay better but I didn't want to ruin my mani at that time so I tried it on a blank sheet of paper. The picture below shows my third attempt. The nail stamp design wasn't completely dry when I placed a top coat so it smudged a bit. Note to self: Wait a couple of minutes for design to dry.

Not bad for a newbie right? What do you think? :)

Zoya Avery with a white stamping design

Pretty & Polished's Jawbreaker

Today I'm going to show you guys a polish that I have been wanting to get my hands on for the past couple of months. It's called 'Jawbreaker' and it was created by Chelsea of Pretty & Polished.

I'm now wearing it on my nails after months of waiting and I couldn't be any happier! <3 First of all, this polish is so hard to purchase since it's always out of stock. I checked Pretty & Polished's shop yesterday and it was out of stock again. Either that or this shade is already discontinued :(

Here are some pictures of my first try in painting my nails myself (I usually have it done by my manicurist :p). I used 1 coat of Essie Marshmallow, 3 coats of Jawbreaker, and 1 coat of Seche Vite top coat. I'm a bit disappointed because I can't get the big glitters on my brush. Hopefully next time, with a bit more shaking of the bottle, I'll be able to get them.

Hope you guys like them!

Pretty & Polished - Jawbreaker
Used Essie Marshmallow as a base and Seche Vite for the top coat.


Nail Art Made Easy with bigRuby Nail Tattoos

After more than a week, I finally got to try my bigRuby Nail Tattoos. I love that it's so easy to apply. I just read the instructions included in the pack and voila, I now have a lovely accent nail.

I had on 
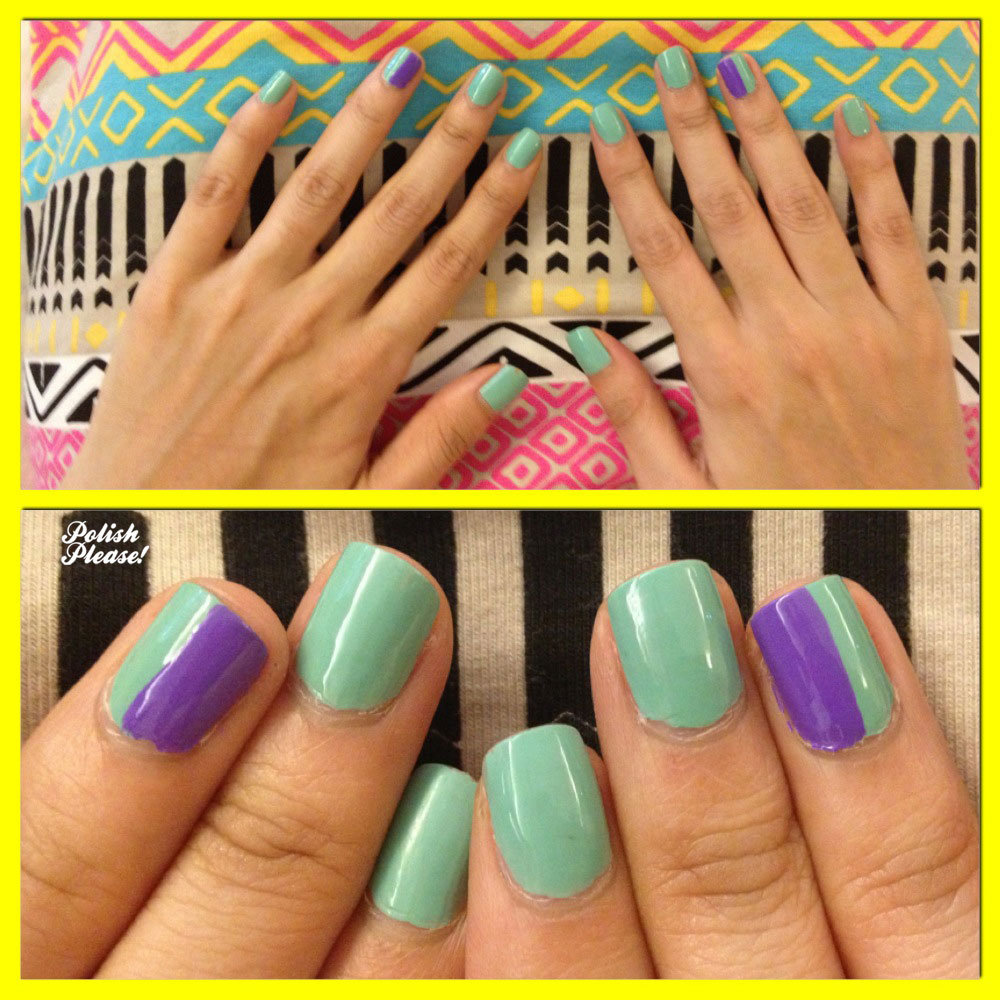
Zoya Skylar for my base color. I would have chosen a lighter nail polish shade if I knew I was going to try out this nail tattoo but I think it still turned out nice.

Zoya Skylar
Zoya Skylar (with Flash)
Zoya Skylar
Zoya Skylar (with Flash)

Zoya Skylar
Zoya Skylar (with Flash)

Here are a few more shots of Zoya Skylar, without flash but with some sunlight this time.

Zoya Skylar
Zoya Skylar (without Flash)
Zoya Skylar
Zoya Skylar (without Flash)

I prepared the following before I started: small scissors (it's kind of hard to cut the small designs accurately if you're using a big one), cotton bud, glass with water, and of course my nail tattoo. I'm using the 'Hers' bigRuby nail tattoo for this one.

Tools needed for applying the bigRuby nail tattoo

I then cut out the tattoo as close to the design as possible. I chose the orange colored design as I thought it would pop out more with the blue nail polish base.

Nail tattoo cut out as close to the design as possible

The next step is the trickiest of them all. I removed the plastic film covering the design and placed the nail tattoo face down on my nail. You have to make sure that the design is positioned correctly because you can't redo it anymore. If you lift up the paper, it's possible that part of the tattoo will stick to your nail and it would be ruined.

bigRuby nail tattoo placed face down on the nail

Once the nail tattoo is positioned on your nail, press it down to make sure that the design is applied flatly without wrinkles. Use the cotton bud dipped in water to wet the back part of the tattoo until the paper slides off, leaving the design on your nail. Once the tattoo is dry, apply 2 coats of top coat and you're done!

bigRuby Nail Tattoo
bigRuby nail tattoo without top coat
bigRuby Nail Tattoo
bigRuby nail tattoo without top coat

bigRuby nail tattoos can be purchased at Polish Please! (http://polishplease.multiply.com) if you're from the Philippines. Each pack has upto 92 designs in different sizes that can be used on both your fingers and toes so it's definitely worth your money.

bigRuby Nail Tattoos

My bigRuby nail tattoos finally arrived last week! :) I'm already contemplating on what nail polish shade to pair with it and I can't wait to try them out. In the meantime, here are some pictures of the nail tattoos.

For those of you who are not aware of the company and the product, here's a snippet from their website.
"bigRuby is a clever little company that designs supercool nail tattoos.  We are a small but amazing team that plan to take the nail art world by storm.  We give you a simple way to take an average mani or pedi and turn it into something unique, creative and fun.  What's best is our tattoos can be worn as subtle or eccentric as you like."
What I love most about their products is the unique designs. They're so cool and quirky and not the usual floral designs (ugh, I hate those!). They're also the first company that I know of to sell nail tattoos and not nail decals or stickers. These nail tattoos, when applied to your nails, will have a completely smooth surface unlike with nail stickers where there is a slight indentation around the edges of the design due to the thickness of the paper used.

These nail tattoos are available in the Philippines only at the Polish Please! store. Anyway, enough of the talking, here are the pictures as promised. I'll post swatches of these nail tattoos on my next post. Stay tuned!

Simple yet supercool packaging.

  
bigRuby nail tattoo designs from L-R: Cosmic, Garden, Henna, Juju, His, Hers
 
 What's inside each packet. This is the 'Hers' design which includes 92 nail tattoos.

Instructions are also included. Very easy to follow!

up